On the beginning of Day #11, of our trip from the Chesapeake to Naples, via Miami, Nellie's engine started occasionally changing RPM. While changing all the fuel filters I found the secondary (the one physically attached to the Cummins) filter to be half fuel and half air. The air probably got in while priming the new tanks' fuel lines.
Changed the Cummins' oil and oil filter.
I've been fighting a Cummins coolant leak. The reservoir was losing about 1/4" per 10 hours of running. I could find no leaks around the engine. I now believe the coolant is escaping via the reservoir's cap—I just found it's cracked! The last bottle was replaced because a seam cracked, now this one's cap. We'll know in short order if this is the problem or not.

Sunday, October 30, 2011

Monday, October 24, 2011
New Fuel Tanks Hold 220 Gallons
I just filled three of Nellie's new tanks. The two aft tanks take 55 gallons each, the port forward 65, and starboard forward 45. The port aft was filled last month just after the tanks were installed. Nothing like a 1000 mile sea trial to see if they work--we're five days into a 20 day trip to Miami. I worried about air leaks in the supply lines and so after priming them ran the engine, underway in the Intracoastal, for one hour on each tank. I've now run all four together for 20 hours without incident.
There's a 2" fill port on each inspection plate. I filled via these using a 30 gpm pump—was sure a lot faster. One retrofit will be to cut-off the neck of the fill port which extends several inches into the tank. This makes the last several inches of tank volume slow to fill because the diesel foam can't disperse beyond the fill port. Live and learn.
There's a 2" fill port on each inspection plate. I filled via these using a 30 gpm pump—was sure a lot faster. One retrofit will be to cut-off the neck of the fill port which extends several inches into the tank. This makes the last several inches of tank volume slow to fill because the diesel foam can't disperse beyond the fill port. Live and learn.
Wednesday, October 19, 2011
Picking at Gel Coat
We spent a few more hours picking at Nellie's bottom these last few days. The gel coat that now remains is sticking pretty well. The plan is to put bottom paint on and wait a few years before re-addressing the peeling gel coat. I did find one small blister (dime sized) yesterday on the port side, just aft and 10" below the four through-hulls. The rest of the hull appears to be fine. The bottom was painted with Interlux Micron CSC. The rudder's packing gland and the hose which attaches it to the hull was replaced. This required the rudder to be removed. A new Diver's Dream 6"x12" was installed.
 |
| The location of the blister in relation to the port side's most aft thru-hull |
 |
| A close-up of the blister |
Tuesday, October 4, 2011
Bottom Repair Thought
4 October 2011
Using picks and paint scrappers we removed all the loose gel coat. As the pictures show a lot came off but there's still a lot of gel coat remaining. The yard is proposing to remove the gel coat mechanically. Unfortunately the shaving process will also take off as much as an 1/8" of fiberglass. This is a technique common in the repair of blistered bottoms. Since there are no blisters on Nellie, removing fiberglass is drastic and unwarranted. I continue to believe the best course of action is to let the gel coat fall off by itself. We could paint epoxy on the areas devoid of gel coat.


After the bottom is cleaned and the loose gel coat removed.

Nellie is doing a good job with the orca impersonation.
After the bottom is cleaned and the loose gel coat removed.
Nellie is doing a good job with the orca impersonation.
Sunday, October 2, 2011
Real Big Bottom Growth
Nellie gets a sea trail of her her new tanks and exhaust system during today's 4.5 hour ride down to Phil Jones' yard on Hopper's Island. The purpose of the haul is to check the bottom, the cutlass bearing and the rudder shaft's packing glad. Nellie's underwater gel coat has been peeling off since before we bought her. Since there are no blisters in the fiberglass the approach has been to let nature take her course. One problem is that when the gel coat falls off it takes the bottom paint with it and thus we're subject to pretty fast flora and fauna growth rates.

Hard to believe but the bottom was last cleaned in May '11. It doesn't help that when the gel coat falls off it takes the bottom paint with it leaving the exposed fiberglass undefended against growth.

This closeup shows barnacles getting under the gel coat. The barnacles are actually doing us a favor by expediting the gel coat's demise. The sooner the gel coat is all off, the sooner we can epoxy the bottom and then barrier coat (Interlux 2000) it.
Hard to believe but the bottom was last cleaned in May '11. It doesn't help that when the gel coat falls off it takes the bottom paint with it leaving the exposed fiberglass undefended against growth.
This closeup shows barnacles getting under the gel coat. The barnacles are actually doing us a favor by expediting the gel coat's demise. The sooner the gel coat is all off, the sooner we can epoxy the bottom and then barrier coat (Interlux 2000) it.
Tuesday, September 27, 2011
We Have Ignition
Houston, we have ignition! After putting 50 gallons in the port aft tank and priming the fuel lines, Nellie started right away. I looked everywhere and found no fuel or raw water leaks--this was the first test of the new exhaust hose too. The Webasto heater, which needs to pull fuel out of the new tanks, worked too. Lowering the height of the tanks by 1/2" wasn't enough to make the existing vent system work. Same problem as before--the tanks' vents are higher than the bottom of the joists.

Since the vent tube must go under the joist and then rise to the tank, this violates the rule that 'the vent tube continuously run downwards'. The pictures below show a way to mitigate the problem. The good news is that drowned vents only effect re-fueling operations, thus the vent line would only need to be cleared prior to refueling.
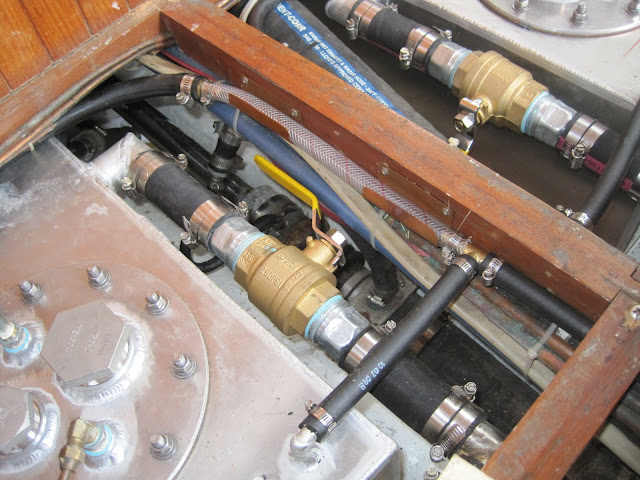
The vent tube attaches to the top of the tank in the bottom center of this photo. The tube then travels inboard to a 'T'. The right leg of the 'T' goes to the aft tank. The left leg, composed partially of semi-transparent tubing, goes to the cabin-side fitting. The semi-transparent tube rides in copper saddles and will be filled with diesel if the vent is flooded.
A flooded vent can be cleared by lowering the 'T' while raising the other end. Then the 'T' is raised and the fuel drains back into the tank.
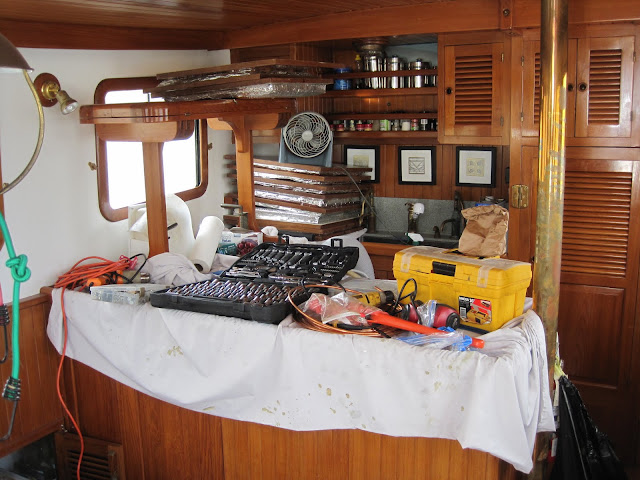
What a mess. Time to clean up!
Since the vent tube must go under the joist and then rise to the tank, this violates the rule that 'the vent tube continuously run downwards'. The pictures below show a way to mitigate the problem. The good news is that drowned vents only effect re-fueling operations, thus the vent line would only need to be cleared prior to refueling.
The vent tube attaches to the top of the tank in the bottom center of this photo. The tube then travels inboard to a 'T'. The right leg of the 'T' goes to the aft tank. The left leg, composed partially of semi-transparent tubing, goes to the cabin-side fitting. The semi-transparent tube rides in copper saddles and will be filled with diesel if the vent is flooded.
A flooded vent can be cleared by lowering the 'T' while raising the other end. Then the 'T' is raised and the fuel drains back into the tank.
What a mess. Time to clean up!
Monday, September 26, 2011
Tanks are Almost Done
Almost done!
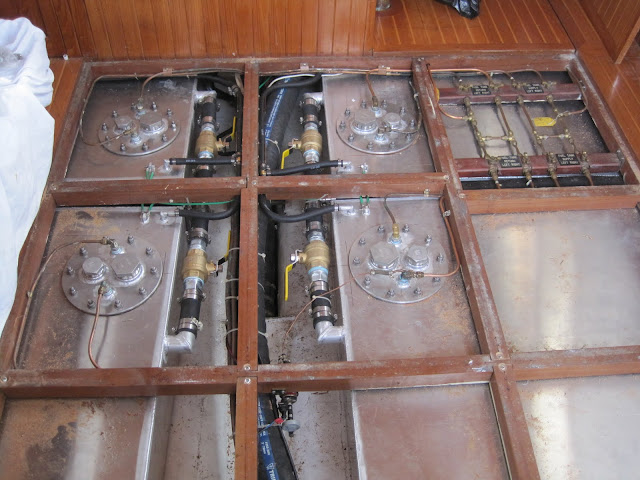 |
| Only the clean-up remains to be done. |
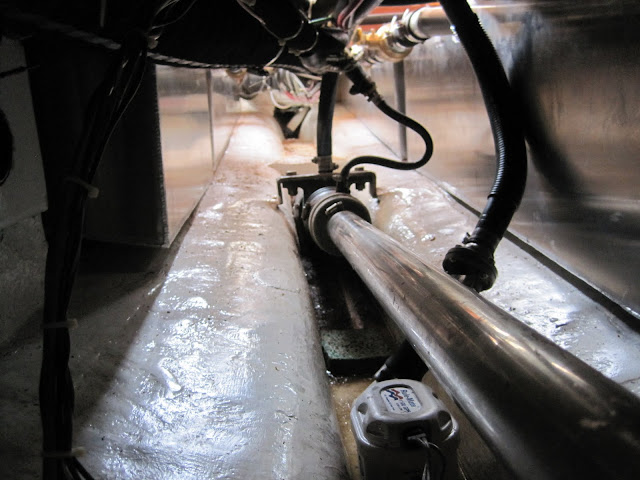 |
| The bilge is less cluttered now. |
Subscribe to:
Posts (Atom)