Got the starboard, rear engine mount reattached this morning. While
removing the wooden shims supporting the engine I was reminded how far this
project has come. The bilge under the shims was a not-so-nice, greasy
reminder.
The rear engine mount, which attracted to the transmission, is held in
place by two 7/16" x 1" bolts. One bolt is high inside the mount. The
other bolt is easily accessible at the mount's base. Each is required to
be torqued to 52 ft-lbs. That's no problem on the bottom bolt. But
restricted ratchet movement and length mean that a relatively short 3/8"
ratchet is the only choice for tightening the upper bolt. Yea, good luck
getting 52 ft-lbs with that.
Engine assembly order is important because as the parts go on access to the
areas near the parts will become more restricted. This is especially true
on the engine's starboard and aft sides.

Wednesday, January 27, 2016

Thursday, January 21, 2016
Parts On...

Finally, parts (the for valve covers) actually went back on the engine today! The engine, except for the pan got its third coat of white enamel.
After putting on the port, rear engine mount, the starboard rear engine mount was removed for cleaning and paint.

Put these green caps on all the window locks. They look a lot better than the hodge podge we took off.

I found the caps at Lowes in the speciality hardware drawers. It's $.93 for three.
Installed the rebuild kit on the Whale MK5 hand bilge pump.
Tuesday, January 12, 2016
Batteries and Wires

Got a port side and starboard side battery off. Heavy suckers!
Thursday, January 7, 2016
Easy Out

Broken rear mounting bolts seem to be a common problem on LNVTs with Cummins engines. Having a four point mount, like Nellie's, doesn't prevent the problem. Rather than merely inspecting the bolts on some periodic basis, Nellie bolts will be replaced biannually. The bolts will be Grade 8 USS, 7/16"-14 x 1-1/4".
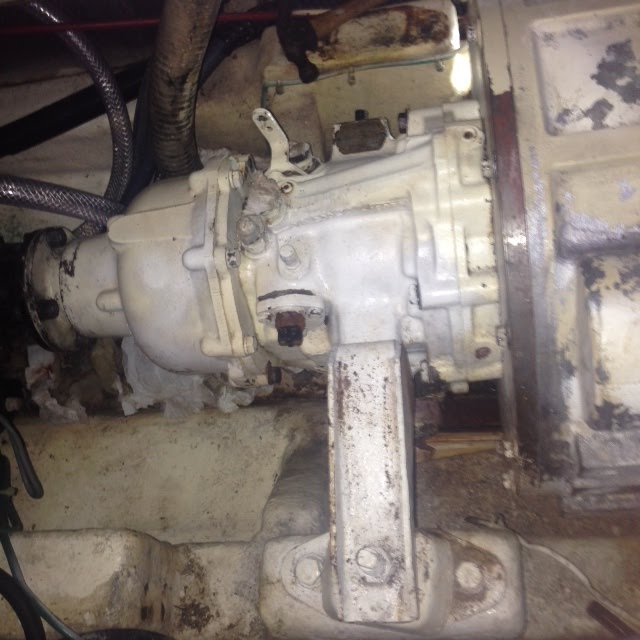
At the top of the picture above is where engine mount was removed. It would be impossible to access it with the turbo and exhaust hose in place. The engine is being held up with cedar shims. Not only do they work, they're easy to work with and they smell good.
Wednesday, January 6, 2016
To quote John Mackie, "Double crap!"

Tuesday, January 5, 2016


Subscribe to:
Posts (Atom)