Wednesday, December 9, 2015

Fwd: Slurpee Installed

I got Nellie's Slurpee in today.  Her bilges have never been so dry!
The 3.5 gallon/minute ShurFlo pump is under the floor board just outside the head.  1" PVC nipples, with 1/2" FIP threads, were screwed onto the ShurFlo.  Then the 1/2" MIP end, of a 1/4" hose fitting, was screwed into the bushing. 
The effluent is pumped into the drain line of the head's sink.  To accomplish this the opposing ends of 1" PVC tee are hose clamped into the cut drain line.  After a bushing (1" to 1/2" FIP) was glued into the tee, the 1/2" MIP end, of a 1/4" hose fitting, was screwed into the bushing. 
The programmable controller, with manual on/off switch, is under the galley's floor board.  Visible just to the right of the controller is a vacuum line connector.  It's here that either the forward or aft bilge pickup is plugged in.
Here's the strum box for the under-engine bilge.  The strum box in the aft bilge is all the way back under the stern tube.

Wednesday, December 2, 2015

Hmm...

Started up the outboard today. No water flow. Notice anything wrong with
the Yamaha's impeller?  Hint: the vanes are supposed to be attached to the impeller, not lying beside it ;-)

Sunday, February 15, 2015

Repairing a Failed VDO Hour Meter (Cummins Engine)

Nellie's VDO hour meter stopped working. The tachometer, which contains the hour meter continued to work fine. This is a common problem on LNVTs. The hour meter's gears are plastic and they simply wear out with extended use. The choice is either to repair or replace the unit. I chose to repair it for the following reasons:

1. The repair cost is about the same as the price of a new unit.
2. A new unit would have a different bezel than all the other instruments on Nellie's panel.
3. The repaired hour meter can be updated to include all the hours since the meter broke (a new VDO's hour meter can't be updated--it must start at 0 hours).
4. New VDOs require a different wiring harness. The old one is plug and play.

Pictured above is the unit repaired by Lauderdale Speedometer and Compass. The hour reading was updated from 5642.35 to 5835.00. Total cost for repair and rejuvenation was just under $200. Hopefully it'll last another 5,600 hours.

Dave Howell
Nellie D. 37VT63

Wednesday, February 11, 2015

New Circuit Labels for the Breaker Panel

After 28 years the circuit labels on Nellie D. 37VT63's breaker panel were looking rather sad. As the breakers were repurposed to support things that didn't exist in 1987--like MFDs, routers, NMEA 2000 bus, etc.--the breaker's labels became a patchwork of different colors, fonts and sizes. They were, in a word, unattractive.

A neat solution is to have a trophy shop laser etch new, black plastic labels for the breaker panel. And, rather than have them do an individual placard for each breaker, one big placard can service an entire column of breakers. This gives a much more integrated look.

Three placards are needed, one AC and two DC. Here's the measured diagram for the AC circuit. The placard's outside dimension was chosen as it covers all traces of the old breaker labels. To make the new label easier to read a single line of all capital letters was specified. The trophy shop determined the proper font size, which was used for all three placards, by fitting the longest label, FLOOR LIGHTS WHITE, in the given space. Affixing the placards was a breeze using the provided, double sided, sticky tape. At $5/placard this project is not only effective it's affordable.

Hat tip to Jay a Sterling, Cruz-In 37VT74, who came up with this idea.

Monday, July 28, 2014

Finally--the splash photo!


It's been a long road but Nellie went feet wet yesterday.  She passed her leak check--but not without incident.  Spilling water rudely reminded me that I still needed to install the heat exchanger zinc.  We ran her through her paces in the river without incident before returning to the yard's dock.  The winds are contrary and blowing up to 20kts.  Not an ideal day for the four hour sea trial home.

Antifouling paint job summary: We went through four gallons of Pettit Ultima SR60 bottom paint.  We used 1/4" nap paint rollers and where necessary, paint brushes, to apply the paint.  This gave us two coats all around and four,1' wide coats, on the waterline.  There was no paint to spare. 


Wednesday, July 23, 2014

Anti Fouling Green

It took two gallons of Pettit's Ultra SR60 to put one coat on the bottom, running gear and bow thruster, and two coats on the waterline. We even have a little left to put under the jack stands.

The 1/4 nap roller covers worked well. Once mixed the paint stayed mixed--they always warn about the copper falling to the bottom.

Weather permitting, tomorrow we'll get the last two gallons of paint on.

Tuesday, July 15, 2014

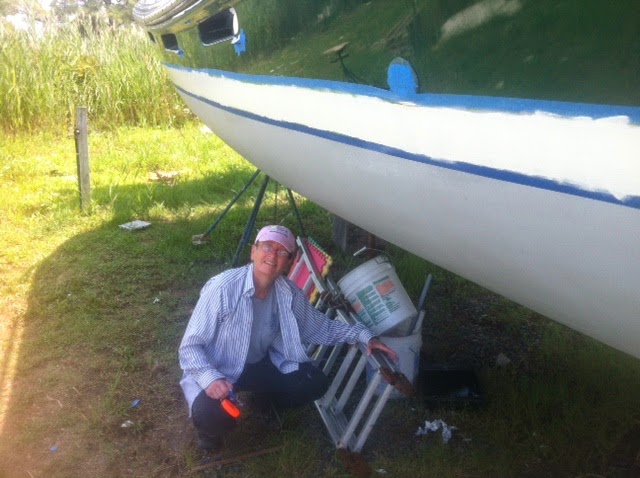
Bootstripe Day Two

After sanding with 320 grit we got the second coat on.
So much for a pint being able to do the bootstripe. The pint got us 1-1/2 times around. Looks like she'll need three and maybe four coats.