Sunday, January 31, 2016

New Throttle and Transmission Cables

Pulled out what looked like perfectly good throttle and transmission cables this morning; but don't the cables always look good, until they break. 


Throttle cable close-up

Taped the new cables to the engineroom end of an old cable and then pulled the old cable out at the helm.  It took a little feeding, but the new cables were able to snake along the old cable route.  Good thing there are two cables.  The first time we tried this technique we pulled the wrong cable, i.e. the one that wasn't attached to a new cable, duh.

For the record:  transmission cable is a Seastar CC33222 and the throttle cable is a Seastar CC33224 (generically 33C 22' and 24' respectively). 


New insulation

Yesterday new insulation was added to the engine room.  The forward Racor is being replumbed with 3/8" fuel line with barbed fittings between the Cummins and the Onan.  Both the Onan fuel line and the gallery saltwater hose were rerouted under the Onan.  The portable water pressure tank, after being degreased, acid etched, primed with POR-15, and painted with Rustoleum white enamel was relocated outboard of the port battery.  The bilge under the engine got another coat of Rustoleum gloss white enamel.  Put the lift pump on the Cummins and added a 3/8" barbed fitting to its supply side.

Wednesday, January 27, 2016

Paint and parts on...

Got the starboard, rear engine mount reattached this morning. While
removing the wooden shims supporting the engine I was reminded how far this
project has come. The bilge under the shims was a not-so-nice, greasy
reminder.

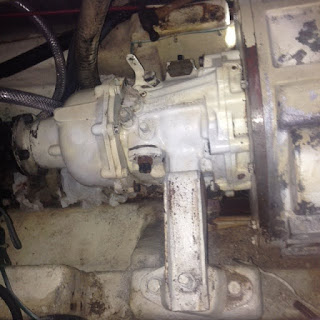
The rear engine mount, which attracted to the transmission, is held in
place by two 7/16" x 1" bolts. One bolt is high inside the mount. The
other bolt is easily accessible at the mount's base. Each is required to
be torqued to 52 ft-lbs. That's no problem on the bottom bolt. But
restricted ratchet movement and length mean that a relatively short 3/8"
ratchet is the only choice for tightening the upper bolt. Yea, good luck
getting 52 ft-lbs with that.

Engine assembly order is important because as the parts go on access to the
areas near the parts will become more restricted. This is especially true
on the engine's starboard and aft sides.

Thursday, January 21, 2016

Parts On...

Finally, parts (the for valve covers) actually went back on the engine today!  The engine, except for the pan got its third coat of white enamel.

After putting on the port, rear engine mount, the starboard rear engine mount was removed for cleaning and paint. 

Put these green caps on all the window locks.  They look a lot better than the hodge podge we took off.

I found the caps at Lowes in the speciality hardware drawers.  It's $.93 for three.

Installed the rebuild kit on the Whale MK5 hand bilge pump. 

Tuesday, January 12, 2016

Batteries and Wires

All the cables and hoses on the starboard side of the engine are being rerouted.

Got a port side and starboard side battery off. Heavy suckers!

Thursday, January 7, 2016

Easy Out


Thank goodness, the headless engine-mount bolt came out relatively easily. From the picture above you can see that the bolt was well lubricated. Memo to self, always use antiseize.  Adding evidence to a fatigue failure is the rough edge of the bolt where it broke.  

Broken rear mounting bolts seem to be a common problem on LNVTs with Cummins engines. Having a four point mount, like Nellie's, doesn't prevent the problem.  Rather than merely inspecting the bolts on some periodic basis, Nellie bolts will be replaced biannually.  The bolts will be Grade 8 USS, 7/16"-14 x 1-1/4".


At the top of the picture above is where engine mount was removed. It would be impossible to access it with the turbo and exhaust hose in place.  The engine is being held up with cedar shims.  Not only do they work, they're easy to work with and they smell good.

Wednesday, January 6, 2016

To quote John Mackie, "Double crap!"

Tried to replace the missing engine mount bolt this morning only to find there was already a bolt, or more properly a headless bolt already in there. It was after asking John's advice on how best to remove the bolt that he said "Crap!" It was after he realized that it was the most inaccessible bolt that he said, "Double crap!" After removing the engine mount I got this picture of the broken bolt. I don't believe it was a shear failure as the mount is still lined up with transmission. Fatigue is the likely culprit. If so, it won't be too hard to get the bolt out.