Monday, September 26, 2016

I Surrender or Moving the Bottle


Relocated Overflow Bottle

After ten years of fighting with Cummins' plastic overflow bottle, today it was removed from the port, forward side of the engine and relocated to the engine room's forward bulkhead.  It's actually nice to have the bottle off the engine.  Not only will the bottle not be shaken to death, but the 5 pound metal bracket that held the bottle on the engine is gone too.

While blowing all the water lines today I found the potable water's pressure tank completely full of water.  There appears to be a hole in the bladder.  It was drained and reinstalled.  Need to keep an eye on it.

Saturday, August 13, 2016

Attempt #4 on the Turbocharger's Gasket

The turbocharger's gasket has a small coolant leak--again.  Over breakfast we discuss what to do about it.  However, with a thousand miles of uphill river infront of us, the answer is pretty clear: repair it now.


Read the Small Print: Turbo Side

It's always nice to find a smoking gun to make you confident in the diagnosis and repair.  Turns out there were two smoking guns.   First, the gasket was on backwards.  I now know it's important to read the small print in contracts and on gaskets.


Corroded Turbocharger Surface

Second, there's noticeable pit corrosion on the turbocharger's mating surface.  Fortunately the fixes are straight forward: reverse the gasket and put RTV sealant on it.

Tomorrow we'll take Nellie out for a sea trial to confirm the repair was successful.

Wednesday, August 3, 2016

Kill Switch Replacement


The New Kill Switch

The Yamaha's kill switch works by grounding a white wire.  The body of the old kill switch had broken under the plastic nut (visible in the picture above).  Because of this the engine would continue to run even with kill-lanyard removed. 

The new switch went in easy enough.  The only stumbling block was running the new wires through the narrow and winding path.  So I didn't.  The new kill switch wires were shortened, soldered to the old wires, and then sealed with shrink wrap.

I'd brag that the switch was purchased for the princely sum of $5 direct from China rather than $60 from Yamaha.  However, after the recent $12 Chinese starter-relay incident--where the new cheap relay fried Nellie's new $90 starter motor--I'll hold off.

The Yamaha now has some new parts: an impeller, spark plugs, and a kill switch.  It's running better because of them.  DBH

SmartPlug Repair


Nellie's Broken Cord Seal

A SmartPlug was installed on Nellie in October of 2012.  It has worked well and we're happy to have the extra safety it affords.  In June of 2016 there was a noticeable tear in its black cord-seal.  I contacted SmartPlug hoping to purchase a repair kit.  Terry Gilliland, tgilliland@smartplug.com, asked that I send him a picture of the problem area.  After seeing the picture (shown above) he said the replacement parts would be provided free under the warranty.  A week later the repair kit (pictured below) was received.  As the picture below shows, a new socket is included with the kit.


SmartPlug's Repair Kit Contents

Today I installed the new parts.  It took about an hour.  If I had to do it again 15 minutes would be sufficient. 


Repaired SmartPlug

The new socket is definitely better than the original: the three wires are held in place with setscrews and the cable is tightly clamped to the socket.  Another nice improvement is that a weather shield is provided to protect the connector when it's not attached to the boat.  DBH

Wednesday, June 22, 2016

M71 Sherwood Raw Water Pump


Sherwood M71 Raw Water Pump

  I took the raw water pump off yesterday as it has been leaking a little oil.  Actually, on a clean engine any oil leak always looks huge.  I then noticed that the bottom weep hole had some dark staining.  Since there's a spare on board I put it in, with a new impeller,  and then looked into getting the stained one rebuilt.  A rebuild kit plus a seal is ~$150, to that add shop time.  A new one is $300.  It's mighty hard to justify a rebuild! 

  I ran the engine after getting the new pump in.  Wouldn't you know it, no water flow.  Pulled the pump and opened it up to find that the new impeller I'd installed was the wrong size.  It was close enough to fool the eye but not the gods of physics.  It wasn't a total loss however, I'm getting really good at removing and reinstalling the pump. 

  Nellie goes through a heat exchanger 1/2" dia. x 2" long pencil zinc in about three months.  I'm not sure if that's good or bad.

  The valve lifter cover on the engine's port side is leaking from the aft, lower corner.  Tightened the bolts.

Sunday, May 29, 2016

RFI and Wiffle Balls

The rearview  picture gets the setup overlay whenever the marine VHF transmits.   It appears to be RFI from inside the pilothouse's navigation console.  Turning off the VHF's breaker, which also powers the cameras, removes the setup screen.  Since neither ham radio affects the video, I suspect the RFI is getting in via the common VHF/camera DC power breaker.

The wiffelballs worked today to keep the coolant from escaping.


Saturday, May 28, 2016

Fuel Additive

This is the second round with Diesel Clean.  Each time the maximum recommended dosage was used--20oz per tank.  I'm hoping it will reduce the engine's exhaust smoke. 

Added coolant to the overflow bottle.  Hopefully the wiffle balls will keep the coolant from escaping from the cap's vent hole. 

Loosened the raw water pump from its flange but was unable to back it out.  I'd hoped to get some liquid gasket between the two to stop the small oil leak.  Next step is to pull the raw water pump.

Thursday, May 26, 2016

Whistles

Nellie's whistles were sounding anemic. The problem lay in the compressor's regulator.  Not enough air could get by it.  The drain valve was removed and replaced with a female air hose fitting.  The line supplying air to the whistle was then plugged into this unregulated port.  What a difference, the whistles now sound great.

Desperate Times...

This is either an act of lunacy or genius but it is driven by desperation. Either way I hope to solve the problem of the leaking coolant overflow bottle. Coolant has been escaping out of the cap's vent hole.  Try as I may I have been unable to stop it. Even reducing the bottle's water level to almost nothing hasn't helped. The engine's vibration, and subsequent coolant sloshing, is the source of the problem.   Hopefully the balls will contain all the fluid well below the cap's level.

Tuesday, May 24, 2016

Anchor Washdown Hose

Finding the right length hose for the anchor washdown bibb has always been problematic.  While in Ace Hardware the other day I found a good solution: individual, aluminum, hose fittings (shown above).  The hose, purchased separately (under $1/ft), can be any length you like.  In the future, when the hose needs to be replaced, the aluminum fittings can be reused.

Wednesday, April 27, 2016

Replacing Deck Caulk


Teakdecking Systems SIS-440

Dug out some failing seams, taped the edges, put in SIS-440, used a putty knife to level the surface, and removed the tape before the caulk setup.  Got a great result.  The SIS-440 set up fast, stuck well, and seems the perfect durometer for a deck joint--not too hard or too soft.  The color also matches the existing caulk.  It's also priced under $15/tube.  What's not to like?

I bought this tube last winter and it summered aboard in the southern Florida heat.  Amazingly, the tube was still good.  Clearly, shelf life isn't a big problem.

Monday, April 18, 2016

Hydraulic Steering Pump Leak

There has been a slow hydraulic oil leak from the steering shaft for a while.  I was unable to wiggle the wheel off.  A gear puller was needed. Replaced an o-ring around the shaft.  Yahoo, it worked.

Sunday, March 27, 2016

Class B AIS

Installed the West Marine AIS-1000 behind the Garmin 5212s. It's using the
Kenwood's antenna.

Monday, February 22, 2016

Voltage Regulator Grounding

Grounding the alternator's external voltage regulator to the engine block,
in lieu of the alternator's ground connection, is a more efficient way to
charge the batteries because it eliminates the problems associated with the
electrical resistance inherent in the mechanical connection between the
alternator and the engine block. Whew, that's a mouthfull ;-)

Here's a real-world example. With Nellie's engine running and the batteries
charging, the voltage between the battery's + and the alternator's ground,
aka the regulator's sense voltage, is 14.2V. However, the actual voltage
between the batteries + and - posts is 13.7V. Hmm, this is a problem. We
need the sense line to measure the battery's voltage, and it's not. The
voltage difference results in significant battery undercharging. By moving
the regulator's ground from the alternator to the block, the sense and
battery voltages will be the same.

Bottom line, I'm moving the voltage regulator's ground from the alternator
to the engine block.

Sunday, January 31, 2016

New Throttle and Transmission Cables

Pulled out what looked like perfectly good throttle and transmission cables this morning; but don't the cables always look good, until they break. 


Throttle cable close-up

Taped the new cables to the engineroom end of an old cable and then pulled the old cable out at the helm.  It took a little feeding, but the new cables were able to snake along the old cable route.  Good thing there are two cables.  The first time we tried this technique we pulled the wrong cable, i.e. the one that wasn't attached to a new cable, duh.

For the record:  transmission cable is a Seastar CC33222 and the throttle cable is a Seastar CC33224 (generically 33C 22' and 24' respectively). 


New insulation

Yesterday new insulation was added to the engine room.  The forward Racor is being replumbed with 3/8" fuel line with barbed fittings between the Cummins and the Onan.  Both the Onan fuel line and the gallery saltwater hose were rerouted under the Onan.  The portable water pressure tank, after being degreased, acid etched, primed with POR-15, and painted with Rustoleum white enamel was relocated outboard of the port battery.  The bilge under the engine got another coat of Rustoleum gloss white enamel.  Put the lift pump on the Cummins and added a 3/8" barbed fitting to its supply side.

Wednesday, January 27, 2016

Paint and parts on...

Got the starboard, rear engine mount reattached this morning. While
removing the wooden shims supporting the engine I was reminded how far this
project has come. The bilge under the shims was a not-so-nice, greasy
reminder.

The rear engine mount, which attracted to the transmission, is held in
place by two 7/16" x 1" bolts. One bolt is high inside the mount. The
other bolt is easily accessible at the mount's base. Each is required to
be torqued to 52 ft-lbs. That's no problem on the bottom bolt. But
restricted ratchet movement and length mean that a relatively short 3/8"
ratchet is the only choice for tightening the upper bolt. Yea, good luck
getting 52 ft-lbs with that.

Engine assembly order is important because as the parts go on access to the
areas near the parts will become more restricted. This is especially true
on the engine's starboard and aft sides.

Thursday, January 21, 2016

Parts On...

Finally, parts (the for valve covers) actually went back on the engine today!  The engine, except for the pan got its third coat of white enamel.

After putting on the port, rear engine mount, the starboard rear engine mount was removed for cleaning and paint. 

Put these green caps on all the window locks.  They look a lot better than the hodge podge we took off.

I found the caps at Lowes in the speciality hardware drawers.  It's $.93 for three.

Installed the rebuild kit on the Whale MK5 hand bilge pump. 

Tuesday, January 12, 2016

Batteries and Wires

All the cables and hoses on the starboard side of the engine are being rerouted.

Got a port side and starboard side battery off. Heavy suckers!

Thursday, January 7, 2016

Easy Out


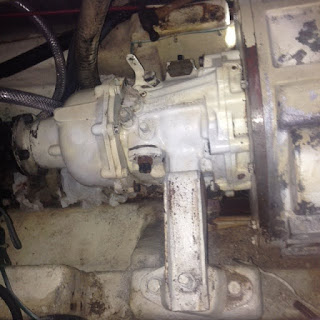
Thank goodness, the headless engine-mount bolt came out relatively easily. From the picture above you can see that the bolt was well lubricated. Memo to self, always use antiseize.  Adding evidence to a fatigue failure is the rough edge of the bolt where it broke.  

Broken rear mounting bolts seem to be a common problem on LNVTs with Cummins engines. Having a four point mount, like Nellie's, doesn't prevent the problem.  Rather than merely inspecting the bolts on some periodic basis, Nellie bolts will be replaced biannually.  The bolts will be Grade 8 USS, 7/16"-14 x 1-1/4".


At the top of the picture above is where engine mount was removed. It would be impossible to access it with the turbo and exhaust hose in place.  The engine is being held up with cedar shims.  Not only do they work, they're easy to work with and they smell good.

Wednesday, January 6, 2016

To quote John Mackie, "Double crap!"

Tried to replace the missing engine mount bolt this morning only to find there was already a bolt, or more properly a headless bolt already in there. It was after asking John's advice on how best to remove the bolt that he said "Crap!" It was after he realized that it was the most inaccessible bolt that he said, "Double crap!" After removing the engine mount I got this picture of the broken bolt. I don't believe it was a shear failure as the mount is still lined up with transmission. Fatigue is the likely culprit. If so, it won't be too hard to get the bolt out.